
- Increased Longevity: Floor sanding increases the lifespan of your flooring, as it removes scratches and wears and tear from the surface.
- Improved Appearance: Floor sanding will make your flooring look brighter and cleaner, giving your home a fresh and modern look.
- Increased Safety: By removing splinters and other hazards, floor sanding can make your floor much safer.
- Increased Value: floor sanding can increase the value of your home, as potential buyers may be more likely to purchase a property with a well-maintained floor.
- Easier Maintenance: Floor sanding can make it easier to keep your flooring clean, as it removes dirt and debris that can collect in the cracks and crevices of the floor.
Cost Considerations for Floor Sanding
floor sanding can be a costly process, depending on the size of the area and the type of flooring. The cost of the project can range from a few hundred dollars to several thousand dollars. The cost of the project will depend on several factors, such as the condition of the flooring, the type of wood, the amount of damage that needs to be repaired, and the desired finish. Additionally, some floor sanding experts may charge extra for specialty finishes, such as staining, buffing, and waxing.
The cost of floor sanding depends on several factors, including the size of the floor, the type of flooring, the condition of the floor, and the complexity of the job. Generally, sanding a floor can cost anywhere from $2.50 to $6 per square foot, though larger jobs may cost more. Additionally, the costs of materials, such as sealer, stain, and finish, will add to the overall cost of the job. Finally, labor costs can also add to the cost of floor sanding, as experienced contractors may charge more than inexperienced ones.
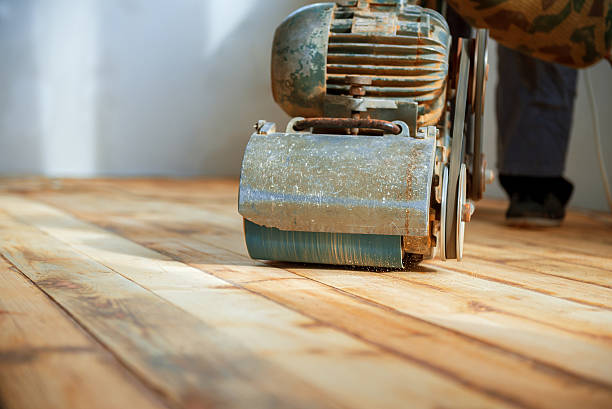
DIY Tips and Tricks for Floor Sanding
- Start with the Right Tools: Make sure you have the correct tools and equipment for the job. This includes a belt sander, edging sander, dust extractor, and a vacuum cleaner.
- Prepare the Room: Clear the room of furniture and any other items that could get in the way. Make sure to lay down drop cloths in order to protect any surfaces that will not be sanded.
- Sand in the Right Direction: Always sand with the grain of the wood. This will ensure a even finish and prevent any unnecessary damage.
- Use the Right Grits: Start with a coarse grit to remove the old finish, then use a finer grit to create a smooth finish.
- Vacuum and Clean: Vacuum up any dust and debris before applying the stain or sealer. This will make sure the surface is clean and ready for the finish.
- Wear Protective Gear: Wear a dust mask and protective eyewear to protect yourself from any dust and debris.
- Work in Sections: Work in small sections to make sure you get an even finish.
- Move Slowly: Move slowly to reduce the risk of scratches and to make sure the finish is even.


Comments