
 By
By 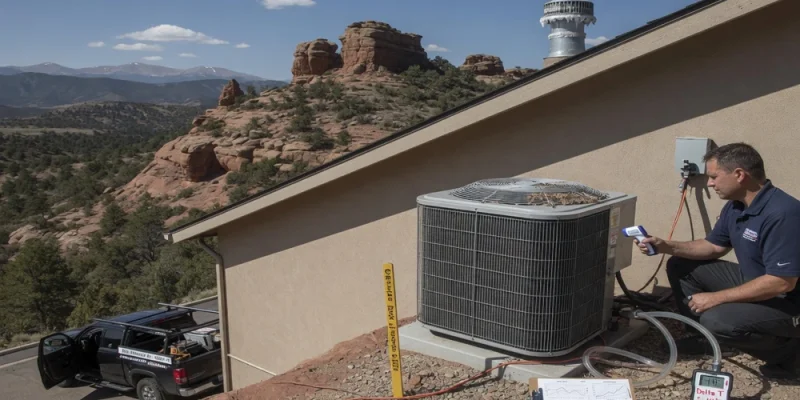
Most homeowners along the Wasatch Front see a furnace replacement as one loud day in the basement. A truck arrives, the old cabinet goes out, and a new one comes in. That view misses the planning before the swap and the testing after it. At 4,200 to 4,700 feet of elevation, that hidden work carries more weight than it does in a sea-level town. Good HVAC service in Utah starts with one plain fact: thinner air changes how a gas burner behaves.
The climate swing shapes the job too. Winter design temperatures along the Front sit in the single digits, and July afternoons climb past 95 degrees in dry air. The furnace and the AC coil on top of it share one blower and one duct system. A tech who plans the heating side without the cooling side usually ends up back at the house for both.
The visible install on a typical replacement takes a day or two. The phases below follow the job in the order an experienced installer handles it, from the first walkthrough to the final signature.
Contractors who work this corridor learn these details house by house. HVAC Services of Utah covers the stretch from Hooper and Ogden down through Layton, Bountiful and Salt Lake City to Lehi. The team handles new furnace and AC installations along with repair and maintenance on residential and commercial systems of every type, with a focus on efficient equipment that keeps utility bills in check. Booking an appointment through their site is the simplest way to get a replacement plan for your own home.
Measuring the House Before Pricing Anything
Sizing by the old unit’s label is how oversized furnaces keep getting installed. The industry standard for residential sizing is ACCA Manual J, which builds the heating and cooling load from the house itself.
- Measure walls, windows, ceiling heights and which way each room faces. West glass in a Kaysville split-level drives the summer load far more than square footage does.
- Note insulation depth in the attic, whether the basement is finished, and how leaky the rim joists and older windows look.
- Take a static pressure reading on the existing system to see whether the ducts can actually move the airflow a new unit needs.
- Check the gas meter and pipe size, the electrical disconnect, and where condensate water can drain.
Doing the Altitude Math
A gas furnace rated at sea level does not deliver its nameplate output in Layton or Riverton. Manufacturers commonly call for derating input about 4 percent per 1,000 feet once above 2,000 feet, and ACHR News has covered how high-altitude kits and orifice changes handle that adjustment. Along the Front, the real output can land a sixth or more below the label.
- Pull the high-altitude chart for the exact furnace model, not a generic rule of thumb.
- Confirm the local gas heating value, since it affects orifice selection.
- Order the high-altitude pressure switch kit or replacement orifices if the manual requires them.
- Pick a condenser and indoor coil that are certified as a matched pair, so the efficiency rating on the quote is the one the home actually gets.
Clearing Out the Old System
Teardown looks simple, but this is where a few safety problems surface.
- Shut off gas and power, then recover the old refrigerant into a cylinder rather than venting it.
- Disconnect and cap the gas line, then pull the old furnace and coil.
- Look hard at the chimney. When a 90 percent furnace stops using the masonry flue, the water heater can end up alone in a chimney sized for two appliances. That “orphaned” heater may draft poorly, and the Department of Energy notes that backdrafting is a real risk with non-sealed-combustion equipment. A liner or vent change may be needed.
- Inspect the supply plenum and return for gaps, then seal them with mastic.
Setting and Piping the New Equipment
- Set the furnace level side to side, with the slight pitch the manual specifies so condensate drains properly.
- Run the PVC intake and exhaust per the manufacturer’s length limits, terminating above expected snow depth and clear of windows.
- Route the condensate line somewhere it cannot freeze. Garage and crawlspace installs often need a pump or heat tape.
- Install the altitude kit before the first firing, not after a lockout call.
- Braze the refrigerant line set with nitrogen flowing through it to keep scale from forming inside the copper.
Proving the System Works
Startup is where a careful installer separates from a fast one. Every number gets measured, not assumed.
- Pressure test the refrigerant circuit with nitrogen, then pull a vacuum below 500 microns and watch whether it holds.
- Release the factory charge and fine-tune it by subcooling per the manufacturer’s chart.
- Fire the furnace and check manifold gas pressure with a manometer, then clock the gas meter to confirm actual input.
- Measure temperature rise across the furnace and keep it inside the range printed on the rating plate.
- Run a combustion analyzer for carbon monoxide, then draft test the water heater with doors closed and exhaust fans running.
- Take static pressure again and compare it with the walkthrough reading.
What the Homeowner Should Walk Away With
A finished job leaves a paper trail as well as warm air. Many cities along the Front require a mechanical permit for a furnace replacement, and the inspection is worth scheduling promptly rather than letting it drift. The installer should hand over a startup sheet with the gas pressure, temperature rise, refrigerant readings and static pressure they recorded, because those numbers become the baseline for every future tune-up.
Warranty registration matters too, since many manufacturers extend parts coverage only when the unit is registered within a set window. Ask for the filter size, how often to change it in a dusty summer, and where the condensate line exits so you can check it during a hard January freeze. A homeowner who knows those few details can spot trouble early, and a system that was measured and tested at elevation tends to give very little trouble to spot.




Comments